
Efflorescence on Bricks: Causes, Prevention, and Removal
Efflorescence on Bricks: Causes, Prevention, and Removal
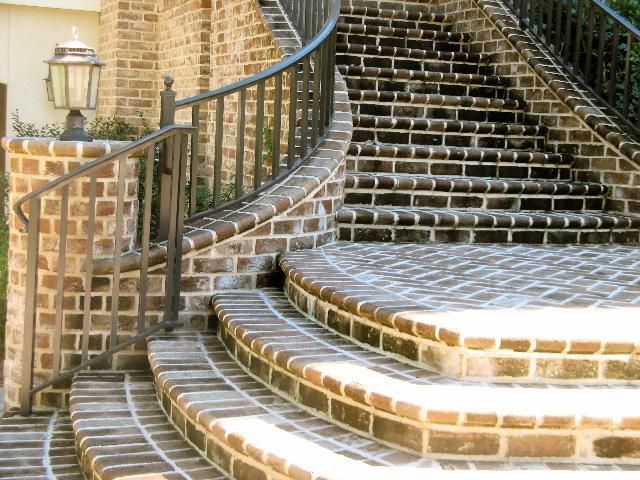
Brick surfaces have a timeless appeal, known for their durability and classic aesthetic. However, one common issue that can mar the beauty of brick structures is efflorescence. If you've ever noticed unsightly white stains on your brick walls, patios, or walkways, you might be dealing with efflorescence. At Magnolia Brick, with locations in Tupelo, MS, and Oxford, MS, we understand the challenges of efflorescence and are here to provide insights on its causes, prevention, and removal.
Understanding Efflorescence
Efflorescence is the formation of white, powdery deposits on the surface of bricks and other masonry materials. It's a natural occurrence that happens when soluble salts within the bricks are drawn to the surface by moisture. When the water evaporates, the salts are left behind, creating the telltale white stains.
Causes of Efflorescence
Efflorescence occurs due to a combination of factors, and understanding its causes is essential for effective prevention and removal. The primary causes include:
1. Water Infiltration:
Efflorescence is most likely to occur in areas where moisture infiltrates the brickwork. This can result from rainwater, groundwater, or even high humidity levels.
2. Soluble Salts in Bricks:
Bricks contain soluble salts, which can leach to the surface when water is present. The types and amounts of salts can vary depending on the brick's composition.
3. Temperature Fluctuations:
Fluctuations in temperature can contribute to the movement of moisture within the bricks. When the temperature rises and falls, it can push moisture to the surface, where it evaporates and leaves behind salts.
4. Inadequate Drainage:
Poor drainage systems or improperly designed structures can lead to the accumulation of moisture in brickwork, exacerbating efflorescence.
Prevention of Efflorescence
Preventing efflorescence involves addressing its underlying causes and implementing strategies to minimize the risk. Here are some effective prevention methods:
1. Proper Design and Construction:
Ensure that your building or structure is designed and constructed with proper drainage systems in place. Adequate slope and drainage away from brick surfaces can help prevent moisture infiltration.
2. Selecting Low-Salt Bricks:
When choosing bricks, opt for those with lower levels of soluble salts. Consult with your brick supplier to select bricks suitable for your specific climate and conditions.
3. Sealing Bricks:
Applying a quality brick sealer can create a barrier that reduces moisture absorption and helps prevent efflorescence. Be sure to follow the manufacturer's recommendations for application.
4. Efficient Water Management:
Ensure that gutters, downspouts, and other water management systems are in good working order to divert rainwater away from brick surfaces.
5. Proper Ventilation:
Adequate ventilation can help minimize humidity levels within structures, reducing the likelihood of efflorescence.
Removing Efflorescence
If efflorescence has already appeared on your bricks, there are steps you can take to remove it. Here's a guide to effective removal:
1. Safety First:
Before starting any removal process, ensure your safety by wearing appropriate protective gear, including gloves and eye protection.
2. Dry Brushing:
Begin by gently brushing the efflorescence with a dry, stiff brush or a nylon scrub brush. This can help remove loose deposits from the surface.
3. Water Rinse:
Next, rinse the affected area with clean, lukewarm water. Avoid using hot water, as it can cause the salts to dissolve and re-deposit on the brick surface.
4. Vinegar Solution:
Mix a solution of equal parts water and white vinegar. Apply this solution to the stained area using a brush or sponge.
5. Scrubbing:
Gently scrub the area with the vinegar solution to loosen and dissolve the efflorescence. Be cautious not to scrub too vigorously, as it may damage the brick surface.
6. Rinse Thoroughly:
After scrubbing, thoroughly rinse the area with clean water to remove any remaining vinegar solution and dissolved salts.
7. Drying:
Allow the cleaned area to dry completely. This will help you assess whether any efflorescence remains or if further treatment is needed.
8. Repeat if Necessary:
In some cases, stubborn efflorescence may require multiple cleaning sessions. If the stains persist, consult a professional for further guidance.
Professional Assistance
For severe or persistent efflorescence issues, it's advisable to seek the assistance of a professional brick restoration or masonry contractor. They have the expertise and tools to effectively diagnose and address efflorescence problems, ensuring the long-term integrity and beauty of your brick surfaces.
Conclusion
Efflorescence is a common issue that can affect the appearance of your brick surfaces. While it may be unsightly, understanding its causes, prevention methods, and removal techniques can help you maintain the timeless beauty and durability of your bricks. Whether you're planning a new construction project or addressing existing efflorescence, proactive measures and proper care will keep your brick surfaces looking their best. At Magnolia Brick, with locations in Tupelo, MS, and Oxford, MS, we're committed to helping you navigate the challenges of brick maintenance and providing solutions that enhance the longevity and appeal of your structures.